Buying lenses designed for macro photography can an expensive proposition. This Nikon 105mm VR macro for example.
This is a standard 50mm f1.8 lens:
If you don't have one, you should. Not to get off topic but no one lens will advance your photography skills like this one. Every camera manufacturer makes one. They're cheap,they have a wide aperture so you can shoot in low light, and the focal length actually makes it a decent portrait lens on digital cameras. It's not a zoom so you're forced to move your feet to compose the shot which is actually a good thing for beginners because it makes you think more about your framing and how distance effects your perspective. But...I digress. Back to the subject at hand.
How does this lens pertain to macro photography? The closest you can be to your subject according to the specs is 1 1/2 feet. Pretty close but not hardly close enough for what we want to do. So, what we want do do is this:
-1.jpg)
That looks a little different, huh? What I've done is just make a mount that will allow me to put a lens on backwards. Which with this lens makes it able to focus really REALLY close. Actually, that's all it can do. Without actually being connected to the body electronically there's no auto-focus, you have to adjust the aperture manually, and you lose any lens related metadata that is usually written into your files. But you have a (super) macro lens for next to no money.
Here's what the mount looks like:
-2.jpg)
-3.jpg)
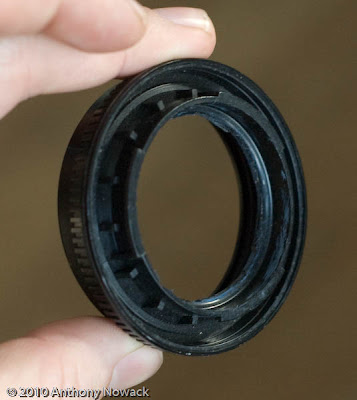
It consists of a UV filter that I took the glass out of (carefully), and a body cap that comes with every slr camera that goes in the place of your lens when you don't have one on. If you're like me, there's always a lens on your camera though so this thing was just collecting dust anyway. If you have to buy one, I think they only cost a couple bucks. Same with a cheap filter. Many camera stores have bins of used filters that they'll give you for next to nothing. Doesn't matter what kind of course because you're going to break the glass out of it anyway. Just get one that matches the thread size of your lens, in my case 52mm.
Take the body cap and cut the center out with a sharp tool (VERY carefully, it might be thick). Then super glue the cap and the glass free filter ring face to face so that you can screw it to the front of your lens when you're done. Let this sit for at least a couple hours to dry. Super glue will bond instantly but it also gives off fumes that like to make a nasty coating on glass. DO NOT put this on your camera or lens right away. If you can find a fume free adhesive that works just as well, let me know. I'd love to not have to use this stuff. When you're done and fume free, mount the lens and find some subjects you'd like to get really close to.
A couple things to keep in mind with macro photography:
1. The focus distance is VERY limited. We're talking centimeters.
2. The depth of focus is paper thin. Even at narrow apertures. I'd start out with two dimensional subjects.
3. "You're gonna need a bigger light." Lighting is another challenge because you're so close and shooting at narrow apertures to get any kind of focus depth that you need to throw a lot of light in. Watch out for shadows from the lens too.
4. Use a tripod. Handholding your camera while shooting this close is a recipe for frustration. Not only are your vibrations magnified as much as your subject, but moving just a couple centimeters back or forward will change your focus drastically.
5. Be careful not to actually hit your subject with the lens. You're going to be about that close.
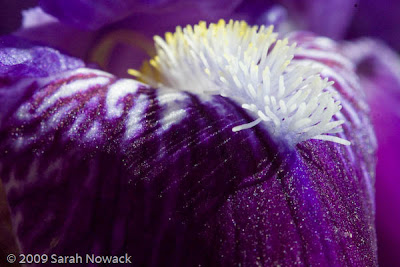
Macro photography is definitely a challenging endevour but the results are unlike anything you can get other wise. Here's a photo my daughter took of a flower with this set up:
-3.jpg)
I'd love to see your results as well. Feel free to experiment with different lenses and materials. You're not actually doing anything to the lens itself so try this with whatever you've got.
If you learned something useful from my site and want to help me keep it going you can buy through our affiliate Amazon.com Camera Store

No comments:
Post a Comment